Wednesday, August 26, 2009

Crumple the Photos?


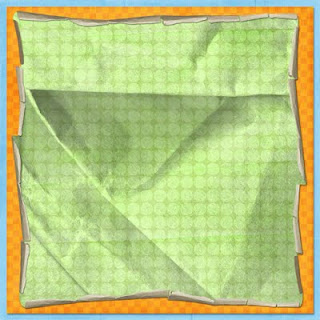
OK, I'm playing with Flergs 'SamandDean' kit and I've gotten this far. I used MGLScraps CU 'Wrinkled Textures' and 'Playing With Paper' by Natali Design. IIRC these are all from ScrapbookGraphics.

I was trying to decide if I wanted to 'float' elements above the crumpled layer using drop shadows, or if I would crumple elements to match the background. Crumpling along with the background won't be easy, but it could be done. And I think it would look pretty darned neat.

Tuesday, August 25, 2009

Image Quality

I gritted my teeth and fired up the Dover Design Manager image browsing tool. It works much better when the CD ROM drive isn't on it's last legs. I copied an image that I thought would make a fun brush and started to practice. It was a scroll, slightly organic, that looked like I could repeat it and get a damask pattern. At 1075 pixels by 463 pixels and 600 pixels per inch, there was plenty of detail.

Oh, dear. Dover has done a very good job of scanning and they provided images at a high resolution. The problem is that digital graphics are much more precise than print. When I took a zoomed-in look at the image, it was grim. The very accurate scan had captured the inaccurate printing. I cleaned up a minimum of pixels and created a brush. It looked like a person with a serious hand tremor had tried to draw it and had given up part way through. It looked awful.

If I wanted to, I could use the Dover image as a starting point and spend a lot of time cleaning up the stray blobs of ink and filling in what is missing. I don't want to. Not for that practice brush. If I had an end product in mind and needed the perfect brush, I'd take the time to clean up an image.

Will I try again with other Dover images? Yes. Knowing that the image quality is good to start with means that I know I can zoom in and see details. What I can see, I can fix, if I take my time. In the future, I won't be nearly as quick to dismiss kits that have what I know are Dover images included in them as kits that were thrown together quickly and with little effort.

Monday, August 24, 2009

Short Lenses

I just looked at a profile photo taken with a cell phone. It wasn't nearly as flattering as the person taking the picture hoped it would be. Her face was distorted, due to lens length and distance from the subject. In theory, a lens' length is measured as the distance from the first piece of glass in the lens, all the way through to the piece of glass at the back of the lens. A 50mm lens is about 2" from front to back, not including all the mounting hardware. All cell phones have very short lenses. They don't have the room for anything else.

This illustration is from Ed Buziak's Photos + Artwork Blog, and you can view the original at http://blogs.salon.com/0004217/2005/07/18.html


Left image taken with a 20mm lens (super short!) at less than 12" from the subject. Center image taken with a 50mm lens (medium to short) and he didn't mention the distance from the subject. Right image taken with an 85mm (medium length) lens at about 4 feet away from the subject. I think of any lens that is 100mm or more to be long, but that's just me.

These demo photos have been shot with the camera 'nose to nose' with the subject. When shooting with short lenses, whatever is closest to the lens will appear much larger than something even 1/2" farther away. If the camera is above the subject's face, the forehead will look larger. If the camera is below, the chin will seem larger. But the feature you notice most is usually the nose. It's always bigger than it should be and that is rarely flattering.

It looks like the subject's posture has changed as well. In the left image, it looks like he is sticking his head out towards the camera. In the middle image, he looks like he is leaning forward. He isn't. That's just more of the distortion at work.

If you can, imagine what you would get if you were to use a short lens to photograph a person with poor posture, who sticks their head forward as they slouch. Then, have the camera above them and use the on-camera flash that flattens things out still more. Their oval face will become a triangle, their nose will look like it's broken and swollen and there will be almost no space between their very big nose and their small mouth. If part of their body is visible, it will look too small to support that head.

Next!

After tackling (and mastering) styles, I'm heading back to brushes. I can load them, I can use them, I can teach about them; but I don't tend to create them. And I've got many Dover books on CD that have copyright free graphics on them that I could use.

Part of the reason I haven't been using the Dover graphics is the Dover application for previewing them is clunky and slow. Then again, the last time I was trying to use my Dover stash, I was working with my old laptop, with the failing CD drive. Time to go dig into creating my own sets of brushes!

Saturday, August 22, 2009

Creating Layouts


I used "Chocolate Berry Reloaded", by Flergs for all of the paper and elements. I used "Playing With Paper" by Natali Design for the paper template to create the crumpled layer.

I think I've found my mojo again. I have been creating layouts with no photos, using kits that I got recently. I've been having a lot of fun with them, starting with one kit and then looking through my collection and pulling things from different kits if I need to use more stuff.

Staying with a single designer, but using more than one of her kits works well for me. Since designers often slightly modify and re-use their elements, I get a layout that doesn't look like it was thrown together like a Frankenstein monster.

I've also discovered that I don't mind using gel, plastic and even the occasional glitter style, in moderation. There's a great tutorial on MGLScraps CT Blog that helped me discover what 'moderation' actually was.

FWIW, I still don't use the Magic Wand tool to select areas that I want to put a style on. I prefer to use the Quick Selection tool, because it is easy to add to or remove from the selection.

Thursday, August 20, 2009

Prepping to Teach

I'll be attending a small 3 day crop in September. I'll be doing the digital thing, and I've been asked by at least two people to do a digital demo/lesson for beginners. I've decided that the best thing I can do for them is to teach them enough to become basic paper imitation style digital scrappers. I'll teach them how to open a new document, drag and drop, how to cut paper into rectangles and add drop shadows and a teensy bit of journaling with the text tool.

While I'm able to teach a great deal more than that, I know that nobody can learn more than that in one sitting and then, they will need time to practice it.

Tuesday, August 18, 2009

Fixing Designer Errors

Oh, dear. I've finally gotten to a point in my Photoshop skills that I am better at some tasks than designers. This does not surprise me. I'm a techno-geek, and I know where my talents lie.

I was working with a kit that I haven't used very much and I dropped a flower onto my layout. The flower was surrounded by a one pixel border of white. That isn't acceptable, but I understand it is a frequent result of using tools like the Magic Wand to make selections. I did a Ctrl + click on the icon in the layers palette, did a couple of selection tweaks and took that one pixel border of white away. It was seconds of work, and even less thought. I knew what to do, I knew the quick and easy way to do it and it was done.

Blink, blink, blink. Why didn't the designer fix that problem? I'm not sure the designer noticed it as a problem and she might not have known how to fix it quickly. I get the impression that a lot of designers are stumbling along with a few basic skills in Photoshop (or whatever application they are using) and they are not able to do any better than the Magic Wand can do, because that's the only tool that they have ever learned how to use.

Ugh. I'm not even sure where the Magic Wand is on the toolbar. I know that it is under another tool and not a 'default' choice. I don't use it. I'll Quick Mask, I'll use the Pen tool, I'll do all sorts of things. But the Magic Wand? I repeat, ugh.

Monday, August 17, 2009

Drop Shadows 101

I got tired of just trusting to a set of numbers from a 'tutorial' about drop shadows and did some experimentation and reading on my own. I'm using CS3, but I think this will be helpful to many Photoshop and Elements users.

• If you will want to zoom in, do that first. You can’t zoom with the Drop Shadow options pop up open.
• Right click on the layer in layers panel>Blending Options>Drop Shadow (Don’t just check the box, click on the words.)
Multiply is a default setting; don’t change it.
Opacity sets how ‘dense’ the shadow is. For very strong light, you want a very strong, dense shadow. For a subtle effect, a shadow with a lower opacity is better. Start at 75% and see how that works.
• Set the direction of the light using the Angle option. The line will indicate where the light comes from. Positive numbers put the shadow to the right and down. Negative numbers put the shadow to the left and up.
• Using global light means that if you adjust the angle of one shadow in your layout, the angle will adjust for all of them. If you have more than one light source, you won't want to use global light for all of your shadows.
Distance is how far away from the center of the object the center of the shadow is. If distance = 0, then it doesn’t matter what your angle is. Things floating in the air have more distance in their shadows.
Size is how much larger the entire shadow is than the original object, from the center to the edge of the faded area. If size = 0 then the shadow is the same size as the object. If size and distance = 0, the shadow cannot be seen, but it is there.
• When you increase the size, the shadow gets larger, and less dense. It is like trying to paint a larger area with the same amount of pigment, watering it down to make it go farther. To adjust for this, you adjust both spread and size to be larger.
Spread will control how much of the shadow from the center out is dense before becoming faded. If the spread is 100% there will be no fading at all and the shadow will have a sharp edge. This can cause some odd shapes in your shadow. There's probably a complicated math reason.
• I leave Contour at the default and don’t check the Anti-aliased box.
Noise will ‘lighten’ your shadow overall, much like Opacity, but it will add random gray and white pixels to the shadow, it won’t make the pixels 'translucent'. You will not see your background through the shadow. This can make your shadow look fake.
• Gray is OK, but consider using a deep brown or deep navy color using the color picker. Sometimes, I'll select the background color and then make it darker.
• For transparent items use a color close to background color
• I always select to have the layer knock out drop shadow. This is because most of my elements are on transparent backgrounds.
• To re-use a shadow in the same layout, you can copy and paste layer styles from one layer to other layers. If you think you will use it again in other layouts, click New Style to start the process of saving it.
Friday, August 14, 2009

Photoshop Styles

I finally understand how styles work. I can create them, edit them, save them, and load them. I have the feeling that everyone who learns about styles does what I did. I created a few styles and thought I saved them. I loaded more styles and decided that I knew what I was doing. The new sets got annoying to scroll through, so I reset back to the original Photoshop styles. I lost the styles that I'd created because I hadn't really saved them. I now know how to save a style that I have created.

There is even a cue in Photoshop that you aren't saving a style. The button you click on says 'New Style,' it does not say 'Save Style.'

Thursday, August 13, 2009

Where Was She?

OK, I can no longer read that 'Scrapbook Update' blog that I thought was accurate. She described the CHA consumer show as being a great event, all wonderful and pleasant. Hah!

Two of my friends were there as consumers. They purchased tickets on-line in advance, to avoid a wait. But they stood in line for long enough to see that those that hadn't, were getting into the show with almost no line at all. The employee who was asking how the ladies were enjoying the event so far got quite an earful, and started to walk away. When he was taken to task for this he said he'd already gotten his face slapped three times! Those would be some extremely irate customers, and they hadn't even made it into the show.

The make-and-takes had no age limit, so the lines were often due to very young children needing to be assisted through a task. The kids that were in the bounce area were screaming with joy(?) and the sound echoed through the arena. Happy kids screaming is something that I enjoy, but only for a brief moment. I'm told the screaming went on all day. They fought strollers, large crowds, long, long lines and saw the same stuff that they had recently seen at GASC.

The ladies I'm writing about had purchased tickets for two days and decided that even though they hadn't gotten to see everything, it was not worth the lines, the crowds, the noise and the annoyance to go back for the second day. One lives nearby in Florida, and the other flew in. They didn't see each other at the show and don't even know each other well.

So, that Update Blog is no longer on my regular reading list and I know I'll give the consumer portion of CHA a miss the next time it pops up. Ugh. It sounds like a nightmare.

Wednesday, August 12, 2009

Crossing 'T's and Dotting 'I's

I have finally finished unzipping, sorting and tagging those kits. When I have a huge job to do, I always realize midway that I need to be nit-picky-perfect about naming files, putting files in exactly the correct folders and so on. I go back to the beginning and fix what I can find or remember. By the time I make it to the end, I just don't care and let errors slip through again.

I will admit that I just threw in the towel at one point and pulled a Scarlett. "I'll worry about that tomorrow."

If and when I finally get all of my files up to standard, I will put every single preview into one directory, so I can search all of my digital scrapping files more easily. I have so much stuff that searching by tag doesn't really work. It takes too long to go through that many files.

Tuesday, August 11, 2009

Silly fun!


I was guided from The Daily Digi to the link for this photo, and I think it's just an amazing set of photos. Those of us that know and use photoshop will completely understand.

There is a high res version uploaded. It will work on my laptop screen. There's an even higher resolution version, too.

And, for what it's worth, I have finally finished sorting and filing all the kits I downloaded because of MGL's Buy My Store deal. I still haven't tagged them though. But sorting takes longer than tagging.

Saturday, August 8, 2009

Time Stamps

MGLScraps, over at ScrapbookGraphics, is having a three day Buy My Store special. I blinked, I bought, I downloaded. It took me four hours to download everything I wanted. Thank goodness for a fast connection! I sorted the zip files by kit and now I'm burning the organized files to DVDs. Next is unzipping them and tagging them. I won't finish that any time soon.

I would not suggest a task like this to a person new at digital scrapping. I am used to downloading large batches of files and this is an amazingly large batch. I found that the longer the list of files I worked with, the easier it was. I didn't have to look through pages of notes and try to remember what I'd downloaded and what I hadn't.

Friday, August 7, 2009

Ummm.... Who?

My MIL gave me a stuffed Eeyore that has a little lantern in his mouth. When you give Eeyore a hug, the lantern lights up. He's freaking adorable. I'm toddling around the house, holding my Eeyore and every so often hugging him to make him light up and I declare that I've got "Eeyore as Diogenes." I think it's perfect, but everyone else in the house looked at me like I was speaking Swedish and had forgotten the vowels. There are times when one of 'those' educations is not helpful.

Wednesday, August 5, 2009

What am I Thinking!?!?!

My long term goal is to use up my paper scrapping stash. I'm switching over to digital for the majority of my scrapping. I haven't bought any paper supplies for a long time and I'm doing well at completing projects with what I've got in my stash.

But I'm not ever going to use up my paper stash if I start buying replacement paper when I use up some of it!

Tuesday, August 4, 2009

Chipboard Album Design

The week in Florida went really well. MIL is a 'bare bones' scrapper and didn't use any of the embellishments that I brought. But we finished her chocolate chipboard album. I got two pages done for mine. I spent my time helping her.

When I got back, I spent a couple of afternoons working on my chipboard album. I'm still not done. I'm one of those slow working, detail oriented scrappers and sometimes I just have to sit and look at things for a while before I make a decision. Even though MIL didn't use the embellishments, I want to use them. It's been so long since I worked in paper, I'm having a hard time adding things in the correct order. I keep gluing stuff down too early.