Sunday, October 19, 2008

The Excitement in my Life


This is Will, my stepson, and me. We drove down to South Carolina on Wednesday. Thursday, we went to Parris Island for Family Day and Friday for the graduation. We had a nice lunch with Will and then drove back up to VA on Friday. His mother had plans for him and she had not thought about including us in those plans. Will is going to see us next weekend, when we go to Disney. Oorah!

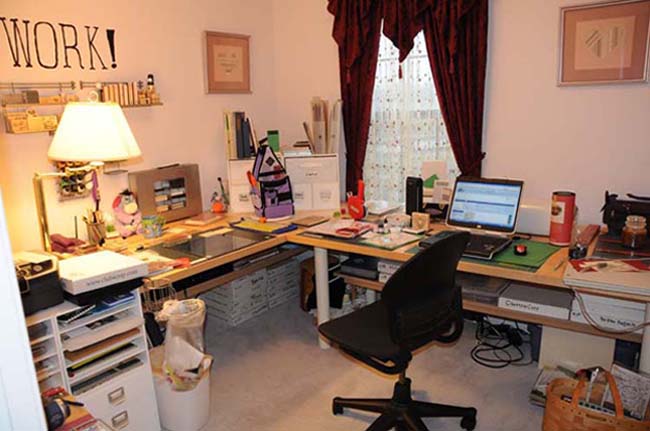
I'm in my studio, printing photos. I was out of photo paper and had planned to get more, but with the trip, hadn't made it out to Costco.

I had thought that with an adult lifestyle, meaning no young children in the house, I wouldn't have so many photos that I couldn't keep up with my scrapbooking. Hah! What with trips to Disney, Marine Corps graduations and life in general, I've got more than enough photos to keep me busy.

Monday, October 13, 2008

S*U*C*C*E*S*S

That's the way you spell success! The three day crop was nowhere near a fail. I did a fail at planning what to bring. I just couldn't decide and threw a bunch of things into several bags and headed out the door. When I got to the crop, I had no adhesive gun. But I did have my laptop. I ended up doing all three days as a digital crop and I do NOT regret it!

I took most of the bags of stuff home the first night. I didn't want to haul them back and forth, so I didn't. I took even more extra stuff home the second day. By the time the third day came to a close, I really didn't have a lot to drag out to the truck. Yay!

Sunday morning, I got up and downloaded a few more files, so I could finish off layouts that I'd started and not had the elements to finish. I don't try to work fast at a crop, so getting 14 pages done was just fine with me. I probably could have gotten more pages done if I had really buckled down, but I wasn't in the mood to buckle down and go into hyperfocus. I wanted to be able to enjoy working on pages and talking with folks.

Will I go digital for other crops? You bet! I love the idea of not having a lot of stuff to carry into the building. I don't really like trying to pack up half of my crop space and take it along. Digital works.

Thursday, October 9, 2008

Found It!

Sometimes, I swear, I need to wait about two hours before I post anything. Yep, that's about how long it took me to find a digital scrapping tutorial page with actual information on it beyond 'How to Re-color an Element.' It is the Digital Scrapbook Place Tutorial Page. I found information on a couple of things that I wanted to learn and a few more that I didn't realize I needed to learn. The tutorials are even interlinked, so if one references something that is covered in another tutorial, you can hop right over and get caught up.

No, it isn't the ultimate resource for digital scrapbookers. I don't think that exists. But it is pretty darned good.

What I Need to Know

There is a convention happening in Salt Lake City this weekend for digital scrappers. I wanted to go at first, then I looked at the schedule of classes. The things that I want to learn are not going to be covered. I don't need to learn how to use a sketch or how to create a color set. I don't need to learn how to organize my files, how to get published in a magazine or how to photograph everyday events.

I want to learn how to wrinkle or curl a ribbon, in some way that doesn't require a plug-in or a template that I must purchase and download. I want to learn how to use my rulers and grids more effectively. I'd like to know how to mask more efficiently. I want to learn how to create a path that does not use a lasso or magic wand. There are probably a lot of other things that I'd like to learn how to do, but I don't even know about them right now. I'm such a beginner that i don't know what I need to learn. I do know what I have already learned and what I keep seeing over and over again.

There are lots and lots of free tutorials out there. The majority of them cover the same things. Re-coloring an element. Combining two pieces of paper to make a third. Changing the color of an element. How to use templates. How to color an element to match your paper. How to install a brush. How to re-color multiple elements. And so on. If I'm looking for a tutorial on how to get text to line up on a curved path, I've got to go to a Photoshop guru and look at a video. The digital scrapbooking sites won't get into things like that for free.

Now I get why the digital scrapbooking gurus have their followings. There aren't any digital scrappers who have free tutorials beyond the basics. But those tutorials are out there. They are on the Photoshop sites.

Tuesday, October 7, 2008

Current Project Excitement

I'm currently working on a digital calendar. I'm using Ztampf! elements and papers for it. I don't have enough of any other designer to complete 24 different layouts in pairs. It is a BLAST! I'm making a date page and a photo page for each month, trying to use a similar theme and style for each month. I'm having a lot of fun putting the papers together, adding the embellishments and creating layouts that are going to look spectacular when I get them printed out.

I'm going to make myself take paper projects to the crop this weekend and I might even work on them. When I get tired of working on paper projects, I'm going to put the paper away and pull out the pixels. The one thing that I'm going to miss at the crop would be my second monitor. That's such a sweet setup. Otherwise, all I need is my laptop, my EHD and my mouse. And a source of power. Which means I'll have to pack an extension cord and a surge suppressor. Hah. It all will fit in a single, cute basket that I already own. No huge tote, no lugging bags and boxes and bins. One basket.

Monday, October 6, 2008

Hold Everything!!!

I was able to contact Miki and she immediately corrected the issue with the wrapping wires and sent me a corrected copy!

We have an addition to the favorite designer list!!! She doesn't have a website of her own, but you can find her designs at Scrapbook-Elements under Miki Ferkul. They have a sort by designer option, so that's what I suggest you use to find all of her kits.

Close, but not Quite

I've been looking at the latest kits available for digital scrapping from many different designers and companies. This preview site shows quite a lot in an easy to scan through format. I thought I'd found a designer that I could add to my list of favorites, which is currently one designer long. Miki Ferkul of MicroFerk Designs looked promising. I purchased, downloaded, and unzipped her 'Rugged Wraps I' and 'Rugged Wraps II' kits.

Drat. When I went to put a wrapping of wires and clips onto one of my photos, the darned thing would not line up. The edges need to be lined up exactly with the layer below them. If they are overlapping, it will look like wires are coming through the item, not around the item. If they don't touch, the illusion of wrapping is lost. I zoomed in and realized that she'd created the wrap skewed. Miki didn't create her edges in a straight line perpendicular to the baseline of a layout. It is impossible to line up the entire wrap. One part or another is either hanging out in space or poking through the layer below. The entire wrap won't line up.

I'll have to tweak the wrap file to get the edges to line up correctly. That is annoying and I would rather not have to do it. Once I get them lined up straight, I'll save them that way so I don't have to do it a second time. But having to correct something that I think should be precise and already correct keeps Miki out of my favorites list. It's only three or four pixels wrong. But there are times when three or four pixels are important and this is one of them.

Sunday, October 5, 2008

Hybrid Projects

When I was working on my hybrid project of a tissue box cover, I realized a couple of things. If you want a digital file to print out at a specific size, you must trick your printer into doing that for you. The average photo printer will take a file and either shrink or stretch it to make it fit into a standard size output. It might also cut off part of the photo if it is too wide or too tall once it has been stretched or shrunk to size.

Even if you have set your printer not to cut off bits of the photo, it will usually do the stretching or shrinking part, to give you the 'best' photo it can. Just setting my printer to produce photos with a white border around the edge will not do what I want. The printer will still shrink or stretch my files so the edges are all exactly the same.

In order to trick my printer into giving me the correct sized graphic, I create a new document that is a standard photo size, such as 5" x 7". Then I put my odd sized graphic into the new document. When I save it as a new .jpg file, there will be a white border filling in to make the whole image 5" x 7". I just have to trim the white part off after I print it to get a graphic the size that I need for my hybrid project.

The other thing is that Photoshop keeps the parts of the layers that you don't see. If I am working with an graphic that is 4.5" x 6.7" and I drag a 12" x 12" piece of paper into that graphic, that paper layer is still 12" x 12". I can't see it, but the extra paper is there. If I cut a 4.5" x 6.7" piece out of the 12" x 12" paper and use that, I don't have extra paper that I can't see. If I let a ribbon hang over the edge, that ribbon will still be there, too. If I don't crop when I'm done with all of my editing, that extra stuff will stay in my image where I can't see it. I've got to merge all my layers and crop the graphic down to the size that I want. (The other option is to crop each layer. That's way too much work.)

In summary, crop your merged or flattened graphic in Photoshop to be exactly the size that you want it to be. Then save your cropped graphic into a new standard photo sized document to create a graphic on a white background. When you print, you'll get a standard sized photo that you can cut with a scissors or paper trimmer to be the size that you want for your hybrid project.

Saturday, October 4, 2008

Sorting Digital Files

There are many possible ways to keep digital scrapping files sorted. I start by using the file system in my operating system, which is Windows XP. I've got a folder under 'My Documents' that I named 'Digiscrapping.' Inside that, I have it broken down by company. Under each company, I keep kits separate. Kits are divided into folders for paper, borders, ribbons, charms, tags and so on.

But I don't actually use Windows XP to find files when I'm working. I use Bridge. Bridge is included in Photoshop, but not Photoshop Elements. In Bridge, every file is tagged, or given descriptive words that apply to the file. Bridge won't do this automatically, you have to do a lot of pointing and clicking. The first tag I put on a file is the name of the designer. Then I add tags for paper, label, charm, border, color or whatever. Some files have many tags, some only have one or two. Because of the way Bridge can be used to sort by tag, I can go into multiple folders at once and get all of my ribbons. I can even tell it what color ribbons I want.

What I've found is that most computer users have some system of sorting and organizing files that works for them. Of the many systems that I've seen, the ones that work the best have clear and specific labels and they are internally consistent. If a complete stranger had to go through your computer to find a particular file, and they could do it without resorting to a general search, your file system is organized enough.

Friday, October 3, 2008

Ztampf!

About two weeks ago, Ztampf!, one of my favorite digiscrapping designers had a sale to celebrate her third year in business. You searched the site to find coupons and would try to use them before other folks found them. I'd found a 20% off coupon, but I wasn't sure if it would still be good. I saved it for later and hoped. If it was meant to be, it would happen.

I just tried that coupon and it was meant to be! I am one very happy camper! I've just downloaded 33 zip files. I'll burn them to a CD to save them for a backup, copy them to my EHD for just in case and then I'll start unzipping and sorting new files! Wheeee!!!

Why do I love these files and this designer so much? Here are two examples. This is from a 'Fastcar' kit I got from ScrapGirls. The designer is Sarah Batdorf. I received it as a .png file, the only thing I've done is save it as a .jpg so I could easily upload it. If you put a straight edge up to your screen, or if you scroll a bit, you'll see that the black and white squares in the flag go straight across the shape. They do get smaller towards the right side of the flag, but that's not quite the right perspective.


Racing fans will also notice that the flag is the wrong shape. A checkered flag that waves when you win a race is not long and narrow, it's almost square. In fact, the NASCAR checkered flag is six squares by five. Did you also notice that this long, narrow ribbon of a flag is flying on a flagpole that could be used as a support pole to hold the grandstand up? It's a little big for the flag. If I were scrapping for a toddler and didn't know anything about racing, I'd like the kit. I wasn't very happy.

The other embellishments in the Fastcar kit were about the same quality, a few were even worse. I can't think about her idea of flames without cringing.


Embellishments from Lie Fhung, the designer of Ztampf! are much more detailed and accurate. Here is a charm from her Antiquest Add on Kit. I did nothing to it but save it as a .jpg to upload it. As you can see, it looks a lot more real. It looks three dimensional. It has highlights and shadows in the right places. It has texture. It does not look like something cut out of a scrap of printed paper and given a streak of shadow.

I've heard several folks say that Fhung's stuff is not their style. They find her kits intimidating, because they are so sophisticated and they are not used to that. They are afraid that they'll do something and the layout will not turn out well. I have the opposite experience. I can throw together anything at all from her kits and the layout will turn out well. As long as I don't range too far from the original kit and use elements from wildly disparate kits, I'm fine.

If you start with lousy parts to work with, you have to be a miracle worker to get something great looking out of it. It the parts are really good, you can be a poor artisan and create something that looks pretty good. I know I am not a miracle worker, so I try to avoid the lousy parts. I hope that I'm not a poor artisan.

Wednesday, October 1, 2008

An Inch of Cardstock


I read on organizedscrapbooks.com that an inch of cardstock is about 50 finished pages and that an inch of patterned paper is about 75 finished pages.

I measured my stash. I've got about 500 pages worth of paper. And that does not include my 8.5x11. I don't need to shop for paper for a while. I really don't.

Right now, I want to complete the projects that I've got stashed away. They are taking up space that I could be using for other things. Possibly things that I don't need, but still, those projects are taking up space.

And if I happen to use up a lot of cardstock while finishing those projects, so much the better.