Sunday, January 12, 2014
Metallic Rubber Bands
Huh. Metallic or 'pearlized' rubber bands don't have the ability to slide as easily as regular rubber bands do. This means they are not a good choice for patterns that are high tension, like the Small Basketweave. How do I know this? I tried to make a Small Basketweave with three different colors of metallic rubber bands. Before I finished, five rubber bands had broken. And further deponent sayeth not.

Thursday, January 9, 2014
Rainbow Looming
Neatness counts. And those diagrams that tell you what order to put rubber bands on in? Make a difference. Even when you think it will matter.
When there are five different rubber bands on a single pin, you need to be able to pull them off in the correct order. You need to be able to find which rubber band needs to be moved next. As soon as you pull on a wrong one, you'll find out what the definition of a problem is. I'm not going to mention how much of a difference this makes when you are digging down through three rubber bands that have been looped on top of those five as part of the process of looping your bands.
To prevent this, you need to pay attention to the order you put your rubber bands on your loom. If you are always changing the order slightly, you'll have problems. Do not put the left side on first for one pattern repeat and then the right side on first for the next pattern repeat. It's gonna get ugly.
Also, you need to keep them on the pin in that order and not allow them to roll and twist about.
Neatness counts. It really does.
When there are five different rubber bands on a single pin, you need to be able to pull them off in the correct order. You need to be able to find which rubber band needs to be moved next. As soon as you pull on a wrong one, you'll find out what the definition of a problem is. I'm not going to mention how much of a difference this makes when you are digging down through three rubber bands that have been looped on top of those five as part of the process of looping your bands.
To prevent this, you need to pay attention to the order you put your rubber bands on your loom. If you are always changing the order slightly, you'll have problems. Do not put the left side on first for one pattern repeat and then the right side on first for the next pattern repeat. It's gonna get ugly.
Also, you need to keep them on the pin in that order and not allow them to roll and twist about.
Neatness counts. It really does.
Tuesday, January 7, 2014
Clean Workspace and PhDs
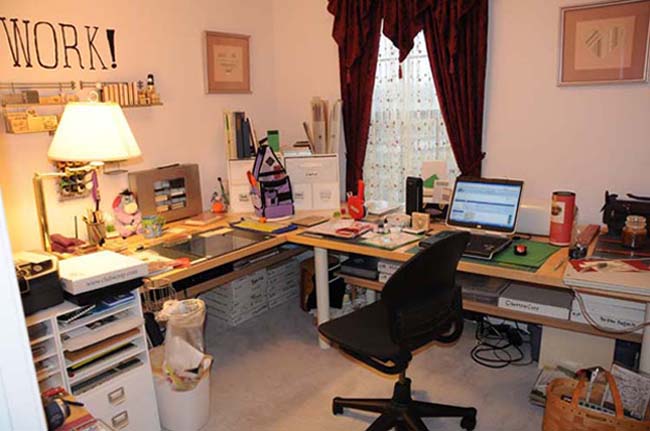
I just cleaned up a pile of oddments on my worktable of projects that I got started working on that did not work out on the first (or even second or third) try. Could I have kept working and turned them into a success? Sure. But they just weren't that important to me to put in that much effort, and therefore, they are now trash.
Am I upset? Not the least. I'm actually quite happy that my work area is a lot cleaner. The more I work in a location, the cleaner that location gets. Seeing my work tables clear off means that I'm using my work tables for actual work. If it isn't a project that I want to complete, it's gone.
I used to use UFO for UnFinished Object and WIP for Work In Progress. PhD, I recently learned, is for a Project half Done.
Snicker. I like the idea of working on my PhDs. Or should that be PshD?
Saving Mr. Banks is a very good movie, BTW. "It should be 'Let us go and fly a kite' but..." Grammar mavens will adore the corrections that P.L.Travers allows to slip past. FWIW, I have a copy of Mary Poppins that was printed in the early 1960's. Hardcover. The original copyright is from 1934. It is dedicated to "MY MOTHER 1875-1928"
Am I upset? Not the least. I'm actually quite happy that my work area is a lot cleaner. The more I work in a location, the cleaner that location gets. Seeing my work tables clear off means that I'm using my work tables for actual work. If it isn't a project that I want to complete, it's gone.
I used to use UFO for UnFinished Object and WIP for Work In Progress. PhD, I recently learned, is for a Project half Done.
Snicker. I like the idea of working on my PhDs. Or should that be PshD?
Saving Mr. Banks is a very good movie, BTW. "It should be 'Let us go and fly a kite' but..." Grammar mavens will adore the corrections that P.L.Travers allows to slip past. FWIW, I have a copy of Mary Poppins that was printed in the early 1960's. Hardcover. The original copyright is from 1934. It is dedicated to "MY MOTHER 1875-1928"
Saturday, January 4, 2014
Rainbow Tips
Well! I have discovered that needing to buy a second loom is simply an early stage in the addiction. I now own six looms. Yes, that's correct, SIX. Since I own some knock-off looms, I am shopping for more of the Rainbow ones.
On to the tips.
When loom shopping, don't go anywhere near the knock offs, no matter how close to the original they might appear. It isn't worth the aggravation. (Trust me on this, been there, done that.)
Flipping the rubber bands into a figure eight is a bother. I just loop the rubber bands onto the pin that is farther away from me, then turn my hand over and loop them onto the closer pin and get my figure eight much faster.
To avoid bending or breaking hooks, remember to slide the rubber bands to the thicker part of the shaft when doing things that require pulling and tugging.
Rainbow Loom C clips are better than the S clips that are found in off-brand rubber band packs.
The more complex patterns that create wide, dense bracelets use up an astonishing number of rubber bands. Getting extra of black and white is a good idea.
Learn how to attach a button closure. It's worth a few failures.
Expect failures when learning a new pattern. Take your failures apart and try again.
Stretched out rubber bands from failures are fragile and break more easily.
Not all rubber bands from failures will be stretched out and fragile.
On to the tips.
When loom shopping, don't go anywhere near the knock offs, no matter how close to the original they might appear. It isn't worth the aggravation. (Trust me on this, been there, done that.)
Flipping the rubber bands into a figure eight is a bother. I just loop the rubber bands onto the pin that is farther away from me, then turn my hand over and loop them onto the closer pin and get my figure eight much faster.
To avoid bending or breaking hooks, remember to slide the rubber bands to the thicker part of the shaft when doing things that require pulling and tugging.
Rainbow Loom C clips are better than the S clips that are found in off-brand rubber band packs.
The more complex patterns that create wide, dense bracelets use up an astonishing number of rubber bands. Getting extra of black and white is a good idea.
Learn how to attach a button closure. It's worth a few failures.
Expect failures when learning a new pattern. Take your failures apart and try again.
Stretched out rubber bands from failures are fragile and break more easily.
Not all rubber bands from failures will be stretched out and fragile.
Tuesday, December 31, 2013
Reference Notebooks
I have a section on my bookshelf for my collected reference materials. I'm not talking about reference books. I have a whole set of three ring notebooks that contain leaflets, pamphlets, printed out pages, handouts from classes, and the instruction sheet(s) that I got when I purchased the whiz-bang gadget of the week to make crafting easier. I've got a notebook on machine embroidery stabilizers and another one on hand embroidery fabrics. I've got at least one notebook for each of my sewing machines.
Yes, I use the information in these notebooks. I can't keep it all in my head. There are days that I think I'm doing well to remember that I wrote that information down once upon a time.
Yes, I use the information in these notebooks. I can't keep it all in my head. There are days that I think I'm doing well to remember that I wrote that information down once upon a time.
Thursday, December 5, 2013
More Rainbow Looming
I'm still addicted. I've discovered that videos by kids may be difficult to follow, but videos by adults who don't know how to zoom in, focus, or fast forward can be equally difficult to follow.
A tip for adults who wish to make these bracelets for themselves is to get a second loom and hook them together to make an 8" bracelet. However, for some of the bracelets that require a second (or even a third!) loom to make a child sized bracelet that doesn't need extensions, you may not wish to make something that big. In that case, make your first bracelet and then immediately rip it apart, bit by bit. Check the size, and remove rubber bands until you get it down to your size. Put away the extra rubber bands and then take the bracelet apart. (It's a PITA to try to save a partly done bracelet) Re-make the bracelet using only the number of rubber bands that you need to make it fit your wrist. There is no other way to make sure that the finished bracelet will fit your wrist. I've tried and tried, and each pattern comes out a different length.
I've purchased rubber bands from a variety of sources and they are of different quality. The Rainbow Loom bands break least often. They all break, and never at convenient times.
Speaking of time, if you know what you are doing and just want to knock out a bracelet you already know how to make, allow 20 minutes. For a new pattern, allow up to 45 minutes.
A tip for adults who wish to make these bracelets for themselves is to get a second loom and hook them together to make an 8" bracelet. However, for some of the bracelets that require a second (or even a third!) loom to make a child sized bracelet that doesn't need extensions, you may not wish to make something that big. In that case, make your first bracelet and then immediately rip it apart, bit by bit. Check the size, and remove rubber bands until you get it down to your size. Put away the extra rubber bands and then take the bracelet apart. (It's a PITA to try to save a partly done bracelet) Re-make the bracelet using only the number of rubber bands that you need to make it fit your wrist. There is no other way to make sure that the finished bracelet will fit your wrist. I've tried and tried, and each pattern comes out a different length.
I've purchased rubber bands from a variety of sources and they are of different quality. The Rainbow Loom bands break least often. They all break, and never at convenient times.
Speaking of time, if you know what you are doing and just want to knock out a bracelet you already know how to make, allow 20 minutes. For a new pattern, allow up to 45 minutes.
Friday, November 22, 2013
Rainbow Addiction!
OK, I've gotten addicted to playing with the Rainbow Loom. But the average sized bracelet this thing creates is 1/2 the standard adult bracelet length. It's all of 4", when an adult bracelet is 8". The solution? Get a second loom, hook the things together and make an 8" bracelet instead.Gradually, I'm getting my co-workers addicted to these silly things as well.
A word to the wise. I first got a knock-off loom. You can't hook it together with a real Rainbow Loom and it doesn't hook solidly to other knock-off looms. The hook isn't as nice and the pegs are not as well shaped. Don't settle for a fake.
Have I noticed a difference in the latex-free rubber bands between the real and the knock-offs? The knock-offs require that you purchase 'S' clips separately. The original Rainbow Loom bands include 'C' clips with each bag of bands. No additional purchase necessary. FWIW, no craft store accepts coupons for the loom or the bands, whether knock-off or the real thing.
The basic bracelet that can be made with the Rainbow loom is kinda wimpy. It is a single chain. Doesn't look like much. But a popular bracelet is called a Fishtail. Still, not so much. The Double Fishtail is pretty neat, though. I started there.
Since that first Fishtail, I've made Double Cross, Hexafish, Ladder, and the Starburst. There are more than a few websites that have links to YouTube videos that teach you how to use the Rainbow Loom, including the Rainbow Loom website itself.
As an unrelated topic, I'm amazed at how little research parents are doing to learn how to help their kids work with this contraption. And it isn't difficult research, either. You watch the video, you follow along. Duh!
A word to the wise. I first got a knock-off loom. You can't hook it together with a real Rainbow Loom and it doesn't hook solidly to other knock-off looms. The hook isn't as nice and the pegs are not as well shaped. Don't settle for a fake.
Have I noticed a difference in the latex-free rubber bands between the real and the knock-offs? The knock-offs require that you purchase 'S' clips separately. The original Rainbow Loom bands include 'C' clips with each bag of bands. No additional purchase necessary. FWIW, no craft store accepts coupons for the loom or the bands, whether knock-off or the real thing.
The basic bracelet that can be made with the Rainbow loom is kinda wimpy. It is a single chain. Doesn't look like much. But a popular bracelet is called a Fishtail. Still, not so much. The Double Fishtail is pretty neat, though. I started there.
Since that first Fishtail, I've made Double Cross, Hexafish, Ladder, and the Starburst. There are more than a few websites that have links to YouTube videos that teach you how to use the Rainbow Loom, including the Rainbow Loom website itself.
As an unrelated topic, I'm amazed at how little research parents are doing to learn how to help their kids work with this contraption. And it isn't difficult research, either. You watch the video, you follow along. Duh!
Subscribe to:
Posts (Atom)


 Posts
Posts

