Friday, June 27, 2008

Trash and Productivity

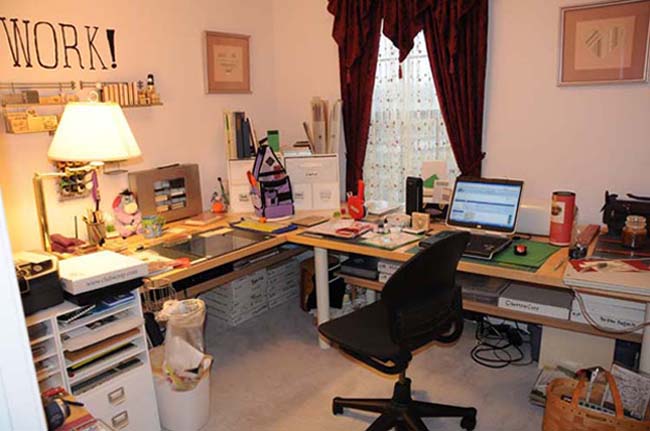
I've noticed recently that if I spend a lot of time scrapping, I have to empty the trashcan in my studio on a daily basis. I don't think I toss a lot of paper scraps, but I must toss a lot of something, because the trashcan sure gets full! I save grocery bags to line that trashcan and I put bags from craft shopping into my bag basket as well. I'm one of those neat freaks and a messy scrapping space will clog up my ability to create. I cannot work in a mess.

Recently the bag basket is getting low. Demand is outpacing supply. For a couple of days, I didn't believe it, then I started thinking.

There are only two of us and I go shopping once a week, getting about three bags of groceries. Yes, I can feed two people for a week on three bags of groceries. But I can't always save all three of those bags. They are wet with meat juices, or they tear. Three bags incoming does not equal daily trash bag outgoing. The only reason I haven't run out of bags earlier is that I go shopping for craft things and save those bags.

If I can't empty the trash, my work area is messy and I cannot create in a mess. Therefore, because my bag basket is getting empty, I must go shopping to re-stock my supply.

If you believe that, I've got a bridge listed on e-bay that you might be interested in...

Wednesday, June 25, 2008

Free Digital Scrapping Tutorials

What a teaser title! But I just wanted to point out that there is a lot of free digital scrapping instruction out there. You just have to search it out, download it and start going through the information. Here's a start.

Jessica has a blog. She puts up a Photoshop Friday entry and has an index to past entries.

Scrap Girls has a free e-book you can download with some basic tips and also has a daily newsletter with tips (and freebies) that you can sign up for.

Scrapper's Guide has a page of free tutorials and links.

Digital Scrapbooking Pages
has a link to their tutorials on the top left of the home page.

Digital Scrapbook Place has classes, a forum and a shop. Scroll down on the home page to find the tutorials on the left side of the page.

There are also plenty of podcasts on how to use Photoshop and Photoshop Elements, but these podcasts are targeted towards photographers or graphic artists. I'm a photographer, so I like the information, but it isn't often what a digiscrapper wants to know.

Just about every major digital scrapping site has a forum, where you can ask questions. Most have a newbie section, where you can ask newbie questions, or search for answers to questions that other newbies asked before you joined.

In short, if you don't know how, there's someone eager to teach you how, and a lot of the instruction is free. There is a caveat. Much of the free instruction is mixed in with a sales pitch. They are hoping that you will follow their instructions, buy the products that they suggest and become a loyal, regular customer.

I'm going to see how far I can get on free instruction. The digital class that I signed up for was a good one, but not the right one for me with the old, outdated software I own. Since I can't afford an upgrade, I've got to learn how to use what I've got. I think I can get pretty darned good, without paying for classes.

Tuesday, June 24, 2008

Page Maps Two-Pagers

I've downloaded a lot of the archived Page Maps that are posted monthly on Becky's site. I pounced on the book when I saw it, knowing that the maps were different from the ones that were on the site. I've looked through them and I can't help but think that a lot of her two-page spreads are very, very similar. Stripe at the top, stripe at the bottom, photos in the middle.

I do a lot of two-page layouts and a lot of the time I create them by using similar paper in two one-page layouts. That works quite well and it gets me out of the 12 x 24 type of thinking. These photos are examples. The first two two-page spreads are taken from the Recollections class, 'Disney Scrapbook in a Day.' I had to make a few changes, because a lot of the paper isn't available any longer and I don't want to purchase all of the embellies. The last two-page spread is taken from a Page Map two-page layout. I think it was December of '07.


Monday, June 23, 2008

Craft Space Planning and Progress

I got my stamp shelving up. I bought two 10' lengths of 1" x 4"manufactured wood and cut them to 40" pieces or 6 shelves. Then I sanded and painted them. I've seen them with molding attached to the front of the shelf, but I know me, and the project wouldn't get done. I used angle brackets, not shelf brackets to attach them to the wall. Shelf brackets are too large.To get the shelves evenly spaced, I hung two and then made a jig out of a scrap of bookboard that fit exactly between the two shelves. I used it instead of a ruler, but I still double checked with my level. While it might look as if the shelves are hanging in the middle of nothing, my L shaped work table will fit underneath them and they will be behind me and to my right when I'm working. I'll sit facing the window, with work surface in front and to my right.

I've been thinking carefully about the rest of my layout and storage. I have a workspace that isn't laid out well for the way that I work. I did my best, but ended up fitting what I had into the space that I had and making the best of it. This time, I hope to plan ahead, find things that will work together, and solve the problems I discovered in my current workspace. My goal is to solve these problems without spending heaps of money.

Saturday, June 21, 2008

GASC

Silly me! I responded to a request for help on the Cricut Forum for a shop that would be at the Great American Scrapbook Convention this weekend. They wanted someone to help out in the booth. They would pay, it wasn't a volunteer job. However, I thought I was signing up for perhaps four hours each day. I was hoping that I'd earn enough to cover what I spent shopping and I had a very short list of things I was looking for, and didn't expect to spend much at all.

I put in 26 hours in three days. I got paid a lot more than I'd hoped I would earn, but I barely had time to shop the show and I didn't take any classes. Will I help out again? Probably not. In fact, I could go so far as to say, No way!

I did sign up for the crop on Friday night. Not the paper crop, I didn't feel like lugging a crop tote, so I signed up for the laptop crop. I think it was the worst crop I have ever attended. They didn't understand digital and gave us goodie bags with paper and stickers. For a digital crop? There was no Internet, we almost didn't have a moderator and the door prizes were along the lines of the goodie bags. I got an eyelet setter and A Technique Tuesday tote and some stamps to go with it. But some of the stamps were inkstained, indicating that they were used. Used door prizes? What were they thinking? I later was told that the goodie bags were leftovers from Thursday night's crop. Don't I feel special? Not!

Will I go to GASC again? I don't think I will. It's just not that well run a show. They placed the Pazzles and the Cricut booths right next to each other. They are direct competitors. The people I was working for, who sell Cricut, consider a Pazzles machine to be a knock-off. I don't know what the Pazzles folks think. I didn't talk to them.

I learned quite a lot while demonstrating the Expression and the Design Studio Software. I can use the pens, and I learned a few tricks with Design Studio. The Technique Tuesday case and stamps are nice, even though some of the stamps have been used. I earned a lot more than I spent, the show was a profit for me overall. But I'm tired, my feet hurt and I didn't get enough time to shop at all. The crop was not well run.

Wednesday, June 18, 2008

By Request... Disney!


I made this little red book to keep notes in. I had reservation numbers, times, addresses and phone numbers, all sorts of things went into my little red book. It is considered 'glue free' because the covers are put together by folding and wrapping the paper in such a way that the ends all tuck in and it holds together without glue! I used my Cricut to make the embellie of The Mouse.


This is a countdown page that I made as a gift for the couple that traveled with us. It's based on the countdown page made by Kathy Fesmire in the Sandylion book, The Essential Disney Idea Book. I used my Cricut again for the title and the characters and purchased stickers for the camping Mickey and Donald. I ended up having to sew the vellum down because it was the easiest way to get nice, tidy pockets that would stand the strain of the tags. The tags are paper that I ran through the printer using a Disney-like Font I downloaded from I know not where. Then I cut the paper up and glued it to a light cardboard and inked the edges. I put the eyelets in with the CAD.

I've got a few Disney 12 x 12 pages finished, but not photographed yet. It's too hot in my studio to do a whole lot of moving around. I'm sipping ice water and tapping idly on a keyboard. FWIW, Britt-ish Designs, on Scrap Matters has a lot of digital Disney-like kits and embellies. I've got a couple of her kits and when I run out of Disney paper (hah!) I'll go to doing Disney Digital pages.

Busy, Busy!

Not so much me, as it is Disney Scrapping. I'm getting a handle on it and have been designing a few of my own pages. I'm mixing them in with pages from a 'professional' designer and I'm having trouble telling the two apart. That's good. I think.

Disney style is extremely busy and detailed. It's rather Victorian, in the 'too much is not enough' style. There isn't a lot of whitespace on a page. Disney is color, pattern, layers, brights, textures and action. Wow! I have to be careful, or you can't find the photos in all the stuff on the page. And that's even true with the 'professional' pages.

Here's what I've found:
  • Mattes are useful, in solid, bright colors that call your attention to the photo.
  • The colors on the page must work using the color wheel to accent the photos. A bright red page calls for green photos.
  • Inking edges on mattes can add to either the confusion or to the ability of the matte to call attention to the photo. Ink with caution.
  • Printed mattes will work, if the print is an overall one and if it is small. Tone on tone prints work well.
  • Combining a light page with dark photos, or a dark page with bright photos helps to call attention to the photos.
  • It's OK to cut photos into shapes on these pages. Usually, I avoid this. Just circles, no mouse-eared cuts, please.
  • Many stickers should be stuck down to white cardstock, then cut out and glued into place on patterned backgrounds. The stickers are translucent and the background will show through.
  • Stamping is good. Embossing is better.
With all the details, Disney pages are very time consuming. Just as you think you are done, there's something else you have yet to complete and it will be something with multiple steps. Disney scrapping calls for every technique I know and every tool I've got, from heat guns for embossing, to eyelet setters, to my craft knife and cutting mat.