
Stacey Julian stated that you can only scrap in the way that you are organized. She's so right. Since I got married, I've been taking digital photos and storing all of them on my laptop. Those photos are organized and I've scrapped myself up to date with them. Yes, I'm caught up.
But most of my earlier photos, from my childhood and after college years are printed out and tossed into boxes somewhere. Those are not organized. I'm not really caught up. But I've made the decision to scrap in digital, so having those paper photos doesn't help me any.
Today, I picked up the first of not that many albums and started scanning. It took all morning, but I have finished well over half of that album. The photos are scanned at a fairly high resolution, so that if possible, I can blow the pictures up a little bit and not have them look too horrible. I'm also planning to use up the paper pages I finished with no photos on them and put some photos on layouts.
I might not have pictures organized for all of my life, but the first few years are organized and the most recent four years are organized. It's a step in the right direction.
Sunday, May 31, 2009
Friday, May 29, 2009
A Link to a Tutorial and Words About Linking
This tutorial really helped me. I don't have objects floating above the background anymore. In a nutshell, I copy a section of background and put it over my object as a new layer, then use a brushtip on the eraser tool to fade the edge. My copied section is put right back on top of where I took it out with the object in the middle of the layer sandwich. If I line the section up with the background, I don't notice it at the edge where it isn't faded. That can be hard to see, so I'll sometimes use a grid (the shortcut is Ctrl+' to turn grids on or off) to keep track of where the section should go.
When I've got it the way I want it, I link the faded section layer and the background layer so they stay aligned with each other. If I need to move the background, I won't have problems with the copied section staying lined up. A merge won't work, I would lose all that fading unless I merge my object layer sandwiched between the background layers. Linked layers don't have to be next to each other in the layer order. I can put any number of layers between them and I can link more than two layers together at once.
To link layers, I make the first layer active and hold the Ctrl key as I select other layers. I right click on any one of the selected layers and click on 'link layers' in the middle of the list. A little bit of chain will show up next to each of the layers that is linked. To unlink all of the layers, I select one of the layers that is linked and right click. Then I click on the option to select linked layers. Right click again on any one of the linked layers that are all now selected and click to unlink them. If I just want to unlink one layer, I select the layer I want removed from the link, right click and then select to unlink layers. The layers are linked only in alignment. If I move one layer, I'll move all the layers that are linked to it.
Something Big is Broken
There are websites all over that have failed this morning. The error messages are many and varied. That's usually a sign that some huge relay has failed and that a computer in one part of the world can no longer talk to other computers and put together a web page.
However, I broke down and set up a Twitter account. I haven't had it for two days and already a person I can't remember where I met has started following me. Then again, she has a big list of followers. It might be that she just picked me at random. I dunno.
I set it up so I could stay in touch with family, not strangers and casual friends. I'll see what happens.
Thursday, May 28, 2009
Manual Dependance?
I was working on a layout this morning and I wanted to intersect two selections. Do I remember the keyboard shortcut for this? Hah! I could add to a selection, I could subtract from a selection. Intersect? I had to look it up. Most of the time, the shortcuts are the same for different tools. It's a small favor, but it's a favor I'm grateful for.
When I can work without looking things up on a regular basis, then I'll know I've really learned Photoshop. When all you do are the same few things, it's pretty easy to remember how to do them. But I'm always trying different things and it's not always easy to remember how to do them.
Each day, I have some small, but useful discovery. Today, I learned more about the Transform options. The keyboard shortcut for Free Transform is Ctrl+T. Or, you can go to Edit>Free Transform.
The object on the active layer will have a box around it with handles on the box. Up in the toolbar, a set of options will appear.
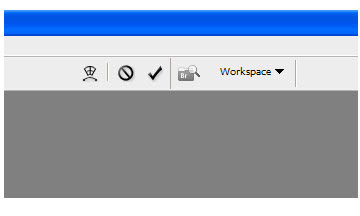
If you click on the transform button that resembles a shape being curved, you'll be able to access the free transform options. When you are done with your transformations, click on the check mark next to the transform button to apply your transformations and exit free transform. If you are having an attack of fail, click on the 'not' button and you will exit free transform with nothing changed.
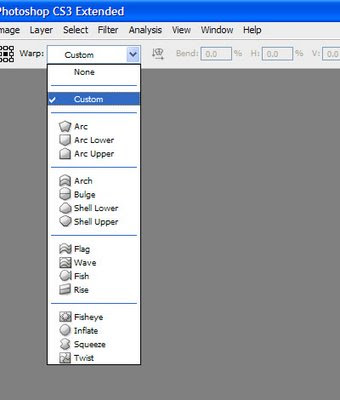
Those presets can be lifesavers and they are certainly time savers. Once your layer has been transformed by a preset, you can move to the custom setting and fine tune the adjustments.
If you are still in transform mode and have not applied or exited, Photoshop will act like it has locked up. You won't be able to do anything that isn't a transformation. You can't switch tools, you can't switch layers. You must either apply or exit to keep working.
When I can work without looking things up on a regular basis, then I'll know I've really learned Photoshop. When all you do are the same few things, it's pretty easy to remember how to do them. But I'm always trying different things and it's not always easy to remember how to do them.
Each day, I have some small, but useful discovery. Today, I learned more about the Transform options. The keyboard shortcut for Free Transform is Ctrl+T. Or, you can go to Edit>Free Transform.
The object on the active layer will have a box around it with handles on the box. Up in the toolbar, a set of options will appear.
If you click on the transform button that resembles a shape being curved, you'll be able to access the free transform options. When you are done with your transformations, click on the check mark next to the transform button to apply your transformations and exit free transform. If you are having an attack of fail, click on the 'not' button and you will exit free transform with nothing changed.
Those presets can be lifesavers and they are certainly time savers. Once your layer has been transformed by a preset, you can move to the custom setting and fine tune the adjustments.
If you are still in transform mode and have not applied or exited, Photoshop will act like it has locked up. You won't be able to do anything that isn't a transformation. You can't switch tools, you can't switch layers. You must either apply or exit to keep working.
Wednesday, May 27, 2009
Don't Believe Every Tutorial You Read!
Not even mine. Free advice is worth what you pay for it.
I had this tutorial about how to create and save a set of brushes. The directions said, "...pick a set of brushes that you are going to delete" as part of the instructions. That would be true if there were a limit to the number of sets you could have.
Nope. There is not a limited number of brush sets possible in Photoshop. You don't have to delete or re-name an existing set of brushes. You don't even have to append to an existing set unless you want to. When saving brushes in CS3, I can click on the brushes I want to save as a part of my new set and save only those brushes. So if I created three keepers and four fails, I can save just the keepers.
So! I've tossed out that tutorial. It was incomplete and incorrect.
FWIW, when loading brushes, it can be a hassle to find the exact set you want. Make sure to save your sets with descriptive names that make sense to you. It's OK to rename a downloaded .abr file to a more descriptive name. Renaming a file won't change the contents of the file. Make sure you don't change the file extension, though. Deleting it and typing it back in while you are changing the name is OK.
Monday, May 25, 2009
Not the Tricky Extraction
I was goofing around in Photoshop and the next thing I knew, I had done this. All the paper and embellishments are from Lorie Davison, of Scrapbook Graphics. Is it Fine Art? No, but it makes me giggle. You'll recognize hubby, and that's me up on the wall.


Timing is Everything
I love my husband, truly I do, but he's got the worst timing... Last night, I was working on finishing up a tricky extraction and he was heading down to his man palace to watch some TV. He didn't want me to feel abandoned, so he started rubbing my shoulders as I was trying to put in points. Ummm.... no. That won't work.
This morning, he forgot that his phone has the worlds most annoying, alerting alarm set at five million decibels and it went off and woke us up. Twice. He can fall back to sleep, I can't. So instead of sleeping late on this holiday weekend, I was up at 6:00 am again. He got up at 6 yesterday because he wanted to go play golf. With a neighbor who woke up at 9:00. I almost got to sleep late on Saturday, but he got up and mowed the lawn bright and early, before it got too hot.
Why is it that when he has a holiday weekend, I don't got any sleep?
Sunday, May 24, 2009
Using the Tablet...
It really is different. I'm liking it, but I had to adjust where it sits on my table and customize the responses. There are a lot of setting options possible with this tablet. Many people don't know that they can set their mouse to be slower or faster, to require a quicker or slower double click, or to be left handed, with the buttons swapped around. They just use the default settings. The default settings on a tablet don't work for me.
It will take some time and testing to find tablet settings that work best for me. When I try to do something and have trouble getting the tablet to work, I probably don't have it adjusted for how I expect it to respond. I open up the settings, slide some adjustment to be more or less precise and try again. When I don't have to think about it and it works, I've got the settings right.
I have also been thinking about the keystrokes and combinations of keystrokes that I use in Photoshop. I use Transform a lot so I set a key on the tablet to be the keystrokes that call up Transform. Other than that, I'm not sure what I will want that I will need to program into the tablet. There are a lot of keys and actions already programmed in.
Saturday, May 23, 2009
Tablet!
I bit the bullet and I got one. An Intuos 4, in the small size. First feedback is really, really good. I like the responsiveness and precision. I'm still getting used to the absolute positioning. With a mouse, you can lift and re-position the mouse, so you are always working in exactly the same area on the table, even though you could be anywhere on the screen. With a tablet, if you are working in the top right corner of the screen, you must be in the top right corner of the tablet. But once I get used to that, I think I'm going to be one of those folks that throws out the mouse and doesn't look back.
The Intuos 4 comes with a mouse with 5 buttons and a selection of alternate pen tips for different feedback when painting. But I can't paint, so the tips aren't so important for me. The default settings for the mouse needed immediate adjustment as the mouse was set to be unresponsive and slow. Once I adjusted it to be a little faster, it was fine. I'm still not going to be a mouse user after a while. The tablet is just too easy to use and it's easier to control than a mouse. Oddly enough, what I miss most on the mouse is the sound of the click. The tablet is silent.
I like the way I could set buttons on the side of the pen for specific clicks and how the touch ring on the tablet itself can be set to do different things as well. I've tried the tablet with Photoshop CS3, and I had to adjust a couple of the settings. I can zoom in or out with the touch ring and I'd set it for too much response when I moved my finger slightly. I'd try for 100% and get 1200% and be looking at fifteen pixels, filling half the screen.
There was a lot of thought and effort put into the design. One of my worries was that I'd need to be moving my left hand all over the place, hitting buttons on the tablet and then going back to the keyboard to hit a specific shortcut. But I can program the buttons on the tablet to do the majority of the keyboard shortcuts that I will need. It's going to take a bit of time before I select which ones I want where and then I'm going to have to memorize them. There isn't an easy way to mark the buttons and there are six of them. I used to keep a cheat sheet tucked under my programmable trackball. I think there will be a cheat sheet under this tablet.
Do I recommend that you dash out and get a tablet? Yes. You might not want this one, with all the bells and whistles, but the Bamboo Fun at $99 (list) would be an excellent option.
Friday, May 22, 2009
Crop Tonight!
There is a Girls Night Out crop at Angela's tonight. What a way to begin a long weekend! I did a little shopping this morning and caught a sale and used a discount coupon. Go me! Now I need to sort and keyword my loot, so I can find it later.
Yesterday, I went through my backup DVDs and made sure that all the digital scrapping kits I had purchased and downloaded were burned to a DVD. I updated my spreadsheet where I track the locations of the files. It took less time than I thought it would and I have more files than I realized. Some kits I have not used yet, some I use again and again. I use orange paper and I didn't have it where I could find it. Now I know where it is.
That's about the same as cleaning up your physical scrap room. I like to think that I'm an organized computer user, but the few things I let slip by me add up over time.
Thursday, May 21, 2009
Quick Masks
Finally, Quick Masks make sense to me! Remember,I'm using CS3 and don't have any other versions of Photoshop or Elements I can test my directions on.... YMMV.
STEP ONE: Very, very important;, Double click on the Quick Mask button at the bottom of the tools palette and bring up the Quick Mask Options pop-up window. The Quick Mask button looks like a gray circle inside a white rectangle. Make sure that your radio button is set for "Color Indicates Selected Areas" which is not the default. Click OK.
STEP TWO: Select the layer you desire and hit the "Q" key to enter Quick Mask, or click on the Quick Mask icon at the bottom of the tools palette. Your color boxes at the bottom of the tools palette should become black and white, with black on top and active to start. That's exactly what you want.
STEP THREE: Select a brush, or a marquee tool or whatever selection tool you desire. Set the parameters for the tool, like brush size and hardness.
STEP FOUR: Paint or otherwise use that tool on your selected layer. You will see a pinkish-reddish 'ink' used wherever you used the tool.
STEP FOUR AND A HALF: If you colored outside the lines, hit the "X" key to switch to painting in white (Make your tool smaller and/or zoom in if you have to) and paint to 'erase' your oopsies. If you undo, you take out everything and might find yourself no longer in Quick Mask mode. Do not use the history palette. It doesn't work inside Quick Mask It only takes you out of Quick Mask. Instead, press 'X' to go back and forth from painting to erasing. As many times as you need it, you can hit it. If you can't remember 'X' there's a 'switch 'em' double ended arrow at the top right of the color selection box at the bottom of the tools palette. That is always visible.
STEP FIVE: When your selection is where you want it, hit 'Q' and exit the Quick Mask. You will have marching ants around all the places where you had pink. If you painted polka dots, you'll have ants around each polka dot. I'd love it if someone who can paint would tell me what the marching ants do around the edge of an area painted with a soft brush to create a feathered edge using their brush. I think they split the difference, but when I try it (and I paint badly) the ants are at the edge of what I've painted.
STEP FIVE AND A HALF: If your selection isn't quite what you wanted, hit 'Q' again and go back to Quick Mask. Keep painting. Or unpainting, whichever you need to do. (There are ways to adjust your selection that aren't painting. I'm not going to go into that now. Just know that you can use Quick Mask with any tool you would use to make a selection and a few that you wouldn't think would work. A paintbrush? Yep, it works and it works really well. So does the lasso tool.) I can start with the Quick Selection tool, refine my edges by painting, switch colors and keep painting, then move to the lasso tool and still edit the same mask!
STEP SIX: When your selection is done and you are happy with your marching ants, you can opt to make adjustments to just that area; you can move, delete or copy it, you can do whatever you want to the area you selected. Quick Mask is just a way of making a selection.
Special Nifty Tricks. If you paint with gray, you select things you can see through. Like a motorcycle windshield. So, using the color picker, you can switch to gray (which shows on your screen as a paler pink) and grab the windshield, go to black (which will show on your screen as pink) and get the handlebar that you can see through the windshield. You can even put the two selections together in one mask. It will have areas of darker and paler pink. As long as you stay in Quick Mask mode, changing the color you paint with won't break anything. Black selects, white erases, and gray selects stuff you can see through. When you move the selection and put the transparent area above a different layer, you will be able to see the layer below through what you have selected. The paler the gray, the more transparent it will be. Ohhh, this is kewl!
If you use a soft brush, instead of a hard one, you can get feathered edges. You can also get streaks in your selection, so be very careful. You can also feather the edges after your selection has been made. I'm not so good with brushes, so I feather the edges after I've made my selection by clicking on the marquee tool and setting the feather option up in the toolbar.
If you are working on a red or pink image and can't see the pink as you paint, you can change the color to be blue or green, or whatever you want that you can see on that red image. That's in the same Quick Mask Options pop-up you used in step one.
If I've started by making a selection and I've already got marching ants, when I go into the Quick Mask mode, whatever I have selected turns pink and the marching ants go away. I can start painting and add to or erase from the selection, I can use a different selection tool and refine my selection; I can move forward in Quick Mask from there. When I exit Quick Mask, my marching ants will return around my refined, tweaked, and fine-tuned selection.
Why would you want to use a keyboard shortcut instead of moving your mouse pointer to make a selection? Because if you use the keyboard shortcut, you can keep your mouse pointer right where you need to start working next and you don't lose your spot.
HTH!!!
Wednesday, May 20, 2009
Camera Settings
While Wonderful Hubby was playing with his new geek toy, I rolled around on the floor and took a lot of photos of him. I realized quickly that I needed fill flash, as he was between me and the light source.
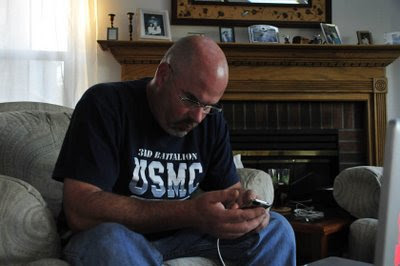
but when I just flipped up the flash, it got too bright and things were overexposed, harsh looking and my poor hubby looked pale and sick.
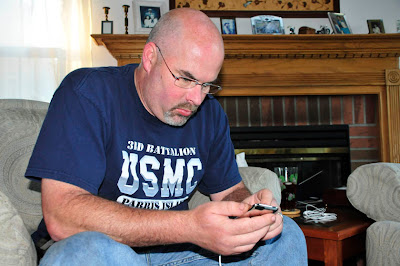
So, I set the exposure compensation (at least I think that's what it's called) for the flash and I tried it at several settings. I can set the flash to be much brighter + settings up to +3, or I can set the flash to be dimmer, down to -3. I decided that -1 was 'just right'.
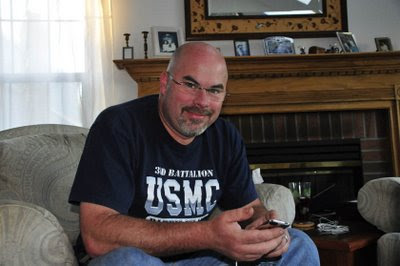
The colors and shadows that I could see in the preview looked just like the colors and shadows that were in real life. If I decide that I want a brighter picture, because I shoot in RAW it will be easy to brighten up a photo that is correctly exposed and captured the right colors. If I were to try to brighten up that very dark photo, or to tone down the one that is too bright, I'd have problems that would require even more corrections.
All this fussing sounds like it took a lot of time, but really, it didn't. The more you know about the settings on your camera, the easier and faster it is to use them. The most important thing is to use that preview in camera and check it against the scene you are trying to capture.
If your camera has a button that looks like the flash lightning bolt next to a +/- sign, you can probably adjust the flash intensity, too.
Tuesday, May 19, 2009
Insanity!
Insanity can be defined as performing the same action again and again, and expecting different results.
I've been creating my own graphics for the background of this blog. The center strip was too narrow for the text and the background was too small on a 17" monitor at high resolution. It wouldn't fill the browser space. Since my first attempt, I've created several more backgrounds, all with the same problems.
Why was I repeatedly creating backgrounds that were not right? That thumping sound you hear is me banging my head on my keyboard.
For a background that will work on a 17" monitor, I need to create a graphic that is 1920 pixels wide and 1200 pixels tall. A lot of the screen real estate is taken up by tool bars, scroll bars and so on, but the quick and dirty numbers are the same as the screen resolution.
My Brain is Full
I've been sucking down on-line tutorials, I've been reading books, I've been learning how to do things in Photoshop. Yesterday, it came to a screeching stop. I'd learned enough for a while. I needed to let it all settle in. So I walked away from the computer for a bit and let myself think of other things. It worked. Today, I'm ready to leap back into things.
"How to Cheat in Photoshop" is the first book I've read that explains the Quick Mask in a way that makes sense. Instead of lots of technobabble about layers that I am not yet grasping and pictures that are half masked and half not, Steve simply directed that I set up the Quick Mask so that color indicates selected areas, instead of the default where color indicates masked areas.
I create a selection that way, not a hole in a layer where the action is visible. My brain works with selections. Using Steve's method, I get marching ants where I expect them to be. I turn on Quick Mask, I paint what I want selected, I tun off Quick Mask and I get marching ants around where I've selected. Then I perform the action I choose on that area. I don't have to remember to paint with black to reveal or to paint with white to hide, because I can't ever remember if I'm hiding the effect or hiding the layer from the effect. Eventually, I'll be able to use Quick Masks with the default setting, but I can't see that I'll ever need to.
Monday, May 18, 2009
One Step Forward...
I was searching for files I could use to practice some of the techniques in the book about Photoshop that I just reviewed. It was taking forever to search for the items. I had too many kits to look through. I needed to break the big set of kits into smaller sub-sets. I started by putting all my kits of alphas in a single directory. Then I put all my kits that were only paper into a directory. I created a couple of other directories that will work for how I sort through things. It wasn't a lot of time spent and it will speed up my searches a great deal. I realized that I'd taken a step towards the Ultimate Organization for digital scrapping files.
Ultimate Organization is when you throw sorting files by kit out the window and sort by embellishment, paper, overlay and so on. You can't sort by kit anymore, because you can't remember which kit had what. It's a big step for me. It would be how I admit to myself that I've got a whole lot of stuff. Refusing to admit it is costing me a lot of time sorting through my files.
Ultimate Organization is when you throw sorting files by kit out the window and sort by embellishment, paper, overlay and so on. You can't sort by kit anymore, because you can't remember which kit had what. It's a big step for me. It would be how I admit to myself that I've got a whole lot of stuff. Refusing to admit it is costing me a lot of time sorting through my files.
Photoshop Reference Book Review
Yesterday, I looked for "The Art of Photoshop" and didn't find it. However, I found "Art & Design in Photoshop" and "How to Cheat in Photoshop" by Steve Caplin. "Art and Design" included a CD-ROM and "How to Cheat" contains a DVD. I rarely use those, but my latest experience with watching videos is changing my mind. I might actually stick those disks into my computer to find out what is on them.
I've read through "Art and Design" already, it isn't one of those fat, try to cover everything books. It's a design book more than anything. And it's a practical design book. For example, there are times when you are trying to put an extracted person into a layout and it just doesn't quite work. The light isn't wrong, the person is a good scale to the rest of the layout and it looks wrong somehow. Mr. Caplin explains what's wrong in a single sentence. It's on page 37, in bold print. He also gives really good sample pictures of things that are both right and wrong throughout the book and explains why they are right and wrong. And in design, there is an actual right and wrong. Some things do not work. They don't convey the message you want to send to the viewer.
This book assumes that you already know how to make Photoshop go. It does not tell you where to find the tools, but it's got lots of useful information on how to make the tools produce textures or effects. It also has examples of different graphic styles and directions on how to get that result for yourself. If I wanted to melt a watch like Dali, I now know how to do it.
Is the book worth the $$$? That's really the guts of a product review. Yes. If I were to take a one hour class/seminar on a subject that I already knew well, and pay 50-100$ for the class, I might expect to walk away with one new fact, tip or way of doing things. I'm nowhere near knowing Photoshop well, so I got a lot of tips from this book. It did not cover a lot of things I already knew. The things I knew, it explained in practical ways, so I could use them in a layout.
I'm gonna go dink around with the techniques described in this book on my own. It' might take me a while to get around to posting a review of the other book I got yesterday.
Sunday, May 17, 2009
Stuck in the Organization Loop
Since I got several new kits for NSD, I have had a slight increase in my digital scrap shopping. I've been getting different things that don't fit into my current keyword system. I've been adding a lot of new keyword, so I can find the things that I own. However, that means that I want to re-sort out my existing keywords and that is a time sink. I have to re-tag items with those keywords in the new location. That means I have to do a search for the items. Then I do the re-tag, then I delete the old keywords. Yawn. But if I don't do the fixes now, when they are easier, I'll hate myself later when there are more files to go through and correct than there are now.
Friday, May 15, 2009
Next Phase Shopping
I started out in digiscrapping just buying kits. I'd get elements, frames and background papers and I was happy. I could create pages the way I used to in paper. Then I learned how to do some neat tricks in Photoshop and I stopped creating paper replicas, but a transition sort of pages, where it would look like paper, but have some digital tricks. Now, I'm shopping for things like page curls and other overlays, so I can create a more fully digital layout. I've got enough paper, now I need tools to do fancy things to that paper. Some of those tools are built into Photoshop and I need to learn how to use them and some of those tools I must go out and buy.
Thursday, May 14, 2009
I Do NOT Want to Forget This!!!
I've been sucking down tutorials and I almost choked on this tip. I snagged it as an aside in the first tutorial by Jen Caputo on Digital Scrapbooking TV. I had some issues with Quick Time, but I'm a die hard PC user. Anyway, I always thought there ought to be some way to just select the item on the layer, without all that Magic Wand or Magnetic Lasso nonsense.
Duh. Move your mouse pointer to the icon in the layers palette. Control+click and the item on that layer will be selected. Instant marching ants neatly all around it. You don't even have to have the layer selected.
I already knew that to deselect something you can hit Control+D.
As Ron Weazley would say, "Brilliant!"
More readable template?
I think so. It took two tries to get to this one, but it's not horrible. And the two complete backgrounds took less effort than getting the horrible templates to work one time!
Live and Learn, Die and Forget It
I wanted to get a set of templates to create curled and tattered edges on a piece of paper. Foolish me, I got a set from one of the big sites that I don't usually buy from. I got a set from a designer that I'd never heard of before. Vicki Stegall is her name, just in case you want to steer clear in the future.
The quality of the pieces, in terms of the graphic image you get is good. However, the templates are a PITA to use. Vicki made them all different sizes! None of the templates are based on a 12" x 12" piece of paper. There is a template that is 8.413" x 2.827". I kid you not. One template that is 12" in length, is 3.72" in width. How in the hoolies can I use them? As soon as I create a clipping mask, I don't have an entire piece of paper with a nifty edge, I've got this stupidly sized strip of paper with a nifty edge. If my paper has a 12x12 design on it, I can't layer in a second sheet and slide it over to fill in, nothing will line up!
I'll admit, I tried. I took the clipping mask piece and tried to append to it to create something that would work under 12" x 12" paper. Can you say annoying? I got it aligned correctly and ready to use. Then I realized that I wanted to use a different template, and had to start all over again. Vicki's system of organizing the templates was useless to me, I wanted to re-do it. Actually, I got so annoyed at that point that I stopped trying to work with those templates. There was just too much work still to be done for the templates to be user-friendly.
I hopped over to the Scrapbookgraphics shop, downloaded the Playing With Paper set from Natali and I'm good to go. The templates from Natali were cheaper than the ones from Vicki. Natali's are based on a 12x12 piece of paper, they are sorted out in directories and I don't have to re-create the wheel to use them. Image quality is excellent and I've even got texture templates to create crumpling in the paper I use. User-friendly? Oh, yes.
Am I going to shop at that huge site again? Probably not. Get another kit from Vicki? Definitely not. I've moved the bookmark for the shop's website to my 'lesser shops' directory. It was in the neutral directory before. There's no chance it will ever end up in the favorites.
Wednesday, May 13, 2009
So That's How They Do It!
I know not where I spotted the tutorial, I've been sucking down so many that I'm surprised I don't have a stomach ache. The photos for many of the extractions are deliberately posed! The digital scrappers are not taking photos and then realizing they could use them in an extraction, they are posing their family members, taking pictures and creating a layout that they have already planned out.
My next challenge is going to be learning how to stitch together a scan. I've never had to do this before, as I used different methods to get my layouts into digital form when I was paper scrapping. Today's challenge was finding a template for a particular task. I started the layout and then was just stuck and could not go forward because I didn't have what I wanted to work with. The joy of digital is that I could go shopping and never leave the house. I did a serious comparison shop and think I ended up with a pretty good choice. And now, back to work!
My next challenge is going to be learning how to stitch together a scan. I've never had to do this before, as I used different methods to get my layouts into digital form when I was paper scrapping. Today's challenge was finding a template for a particular task. I started the layout and then was just stuck and could not go forward because I didn't have what I wanted to work with. The joy of digital is that I could go shopping and never leave the house. I did a serious comparison shop and think I ended up with a pretty good choice. And now, back to work!
Tuesday, May 12, 2009
Loading Brushes/Stamps in CS3
To load a brush into CS3, you first have to copy the unzipped .abr file that you just downloaded (which may contain more than one brush) into the correct directory. The directory that CS3 uses when searching for .abr files is in your Application Data directory that is stored under your user profile in Windows. The directions I was using were for earlier versions of Photoshop and had an incorrect location. You may have to set your computer to display hidden files and folders to see it. C:\Documents and Settings\Username\Application Data\Adobe\Adobe Photoshop CS3\Presets\Brushes. Username will be something different, usually your own name. Other versions of Photoshop start under the C:\Program Files directory and then it's \Adobe\Adobe Photoshop...
When the .abr files are in the correct Brushes directory for your version, go open up Photoshop and click on the brush tool. Up in the toolbar, there will be the word "Brush" and to the right a picture of the brush that has been selected. To the right of that is a tiny arrow, pointing down. Click on that and you'll get the Brush Preset Picker to pop open. At the top right of that pop-up is an arrow pointing to the right that is inside a circle. Click on that arrow and you'll have a choice of actions. OR, press F5 to pop open the Brushes Palette and click on the tab at the almost top right to get the same set of choices. Clicking at the very top right will close the Palette. You end up with the same choices, but I can't ever remember F5.
From the set of choices, select 'load brushes' and you'll be taken to a pop up window where you can select the .abr file that you just copied into the directory two paragraphs ago. Select the file that you want and click on the Load button. The files will be added on to the bottom of the list of teeny-tiny graphics that you scroll through to select a brush. The numbers at the bottom of the graphics are the size of the graphic, they will duplicate and won't help you keep your brushes sorted out.
I have these lovely large 'stamps' that I've downloaded and unzipped. I've put the .abr files into the correct location and loaded them.
What can I do with them? Lots of things! I can use them with the Pattern Stamp, I can use them with a Brush, I can use them with an Eraser. Depending on which tool I select, I can make a precise stamp, I can make a pale, faint single pressing, I can stamp multiple times in the same spot and get a heavily inked looking image. I can 'paint' with it, creating a spectacular smeary thing. I can select the color I use to stamp or paint with. I can erase completely where I click or I can erase a percentage of the layer where I click. the possibilities are endless.
Next - Stamps
That's next on the list to master. I just downloaded a bunch of stamps from Tangie Baxter at ScrapbookGraphics. If I have them, I need to learn how to use them. I'm sure that it won't be difficult. I have confused memories about running into problems with that in PS7 when I was taking that digital scrapping class. I had to rename existing sets or append to existing sets when that wasn't what I wanted to do at all. I wanted to create and save new sets. I've got reference texts, I'm sure I'll figure it out.
I might also figure out brushes at the same time, since they overlap so much and I have downloaded a few brush files in that kit as well. Off to the salt mines!
I might also figure out brushes at the same time, since they overlap so much and I have downloaded a few brush files in that kit as well. Off to the salt mines!
Monday, May 11, 2009
Working in Stages
I'd always known that as I learned more and more things to do in Photoshop, I would stop imitating paper layouts. I'm at that point. The process of creating a fully digital style layout is different than creating a paper imitation. I break the digital task into different sections and steps.
I'm now creating what I call sub-images. I am working with separate files with layers, adjusting, adding and creating elements that I will eventually put into a layered layout. This makes me think I have learned something about using Photoshop. I've barely scratched the surface, but I tell myself that as a digital scrapper, I'm not a beginner.
It feels pretty good to be working like this. I have smaller units of tasks that I can finish off quickly or spend a lot of time on. I can substitute something as a place holder while I try to learn or refine a technique. I can swap out different versions to find the one that I prefer. I can save something that is at one stage and re-use it later.
Sunday, May 10, 2009
Sucking Down Tutorials...
I have discovered another source of tutorials for digital scrapping. The forums on some of the websites that sell digital scrapping kits. I kid you not, these ladies are giving away instruction for free that I'd pay good money to get. I just grabbed one from the Studio Girls website that is teaching me hot to get a layer to mold to the layer underneath it. Like when I've got crumpled paper and I want to put text onto it. Yeah. We've all fought with that one. You put the text down and adjust the opacity, but then the text goes all pale and faint.
Here's a link to the tutorial. It might turn you off, because there are no nifty pictures to go along with it, but I was just fine. The lady writing the tutorial also listed the reference she used. Hmmm.... Another book I might like to look at. I'll bet it's expensive. Perhaps I could find it through interlibrary loan?
Here's a link to the tutorial. It might turn you off, because there are no nifty pictures to go along with it, but I was just fine. The lady writing the tutorial also listed the reference she used. Hmmm.... Another book I might like to look at. I'll bet it's expensive. Perhaps I could find it through interlibrary loan?
Friday, May 8, 2009
Girls Night Out
Two Fridays a month, I head out to a crop at Angelas. I take my laptop and work in digital, instead of packing up a crop tote full of paper and embellies and stamps and inks and tools and adhesive. Last time, I took my motorcycle, but tonight the weather is iffy. I could ride home in the rain, but I wouldn't want to have my laptop get rained on. Holding an umbrella over a motorcycle just does not happen.
I'll be creating layouts using some photos of my Wonderful Husband working on a friend's car. He does that a lot, so I make sure that I take pictures every now and then. Photos of car repairs are why I am always on the lookout for masculine, adult digital kits. I've got new ones to play with, thanks to sales for NSD.
I'll be creating layouts using some photos of my Wonderful Husband working on a friend's car. He does that a lot, so I make sure that I take pictures every now and then. Photos of car repairs are why I am always on the lookout for masculine, adult digital kits. I've got new ones to play with, thanks to sales for NSD.
Thursday, May 7, 2009
Still Need a Pin
One of the first questions my husband asked me when he walked in the door last night was if I'd done any new layouts. I can't remember his exact words, but he was clearly asking if I'd done any more fantasy layouts. He never asked about what layouts I'd done before. This is definitely a change.
However, I'd worked on an extraction and on running errands and getting dinner ready, and a little on my resume, I didn't have any new layouts. Today, I'll have a new one. I want to see if I can create a layout with me looking in through a window. I don't know if the photo I extracted yesterday has my face looking in the right direction.
I think I should try to layer in the photo before I do an extraction to check and see if it will possibly work before I do all the work. Hmmm.... Learn something new every day.
BTW, yesterday's something new was how to choose a ripe cantaloupe. The skin should have dimples on it, it should smell like a cantaloupe and the end should depress slightly. If I select a melon that I think looks good, it's a long way from being ripe. The melons that look a teeny bit shriveled and soft are actually the ones ready to eat.
Wednesday, May 6, 2009
I Need A Pin
I need it to pop the overinflated balloon that is my head. I did a second fantasy layout of a friend of the family sitting on a mushroom. In the photo I took, he had been sitting on a park bench. I sent a copy to Wonderful Hubby who gushed over it and sent it to the friend. More gushing ensued.
Honestly? I didn't think I'd done enough work to have the layout qualify for that amount of praise. While everyone else sees an incredible layout, I see the things that I still need to learn. I wasn't pleased with the shadows that weren't there. I wasn't pleased with the different qualities of light. I've got a long mental list of the things that I'd like to get better at and do differently. I am a beginner in this style and my layouts show it.
But one thing hubby said made me crack up. "Jean can put you in a fantasy world sitting on a mushroom, and they can't come up with Air Force One in a picture of New York City without actually flying through the city and scaring everyone half to death."
Tuesday, May 5, 2009
NSD Loot
Everything is downloaded, everything is unzipped. I'm still tagging things, but I had time to create a layout.
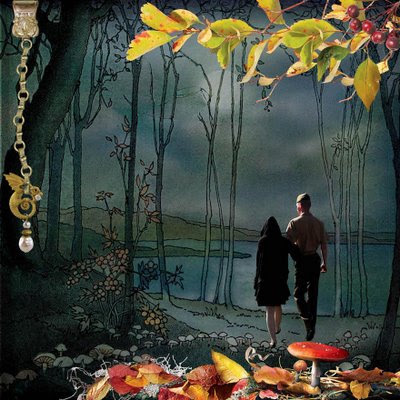
The paper and embellies are from Lorie Davison. After I did a little poking around on DigiShopTalk, I found that her style is called fantasy. While a lot of her kits contain faeries and similar fantastical creatures, there's enough other, non fantastical items that I'll be able to use them. I really like the different ways that I can put a photo into a layout. She provides windows with transparent backgrounds, and doorways and other idea stimulating objects.

The paper and embellies are from Lorie Davison. After I did a little poking around on DigiShopTalk, I found that her style is called fantasy. While a lot of her kits contain faeries and similar fantastical creatures, there's enough other, non fantastical items that I'll be able to use them. I really like the different ways that I can put a photo into a layout. She provides windows with transparent backgrounds, and doorways and other idea stimulating objects.
Monday, May 4, 2009
Labels and Comments
I went through my old posts and made sure that the labels were more useful in describing the contents. If you click on the 'tutorials' label, you will now see the posts that I consider to be about tutorials or that are my own tutorial-like postings. If you click on the 'Disney' label you'll get my posts about trips as well as posts with my Disney layouts. I didn't move posts, so bookmarks should not have broken.
If nobody comments, I have no way of knowing if anyone is reading. I post partly for myself but I post what I think other folks want to know about what is going on inside my head. Since there are often a lot of different things inside my head, I'm asking for feedback on which things are interesting to someone other than myself. I may be many things, but I try not to be boring.
If nobody comments, I have no way of knowing if anyone is reading. I post partly for myself but I post what I think other folks want to know about what is going on inside my head. Since there are often a lot of different things inside my head, I'm asking for feedback on which things are interesting to someone other than myself. I may be many things, but I try not to be boring.
Bit by Bit...
Today we go back to that 8 bits or 16 bits decision for working with images in Photoshop. What bit depth is realistic?
I should edit my photos at 16 bits, according to Martin Evening's book. But I can't see the 8 bit vs. 16 bit differences. Not in my finished photos. In fact, Mr. Evening admits that the differences are not visible to anyone. Martin works in 16 bits for the future "just in case." My original RAW files are in 16 bits. That's nice. Thirty years from now, when nobody cares, I'll possibly be able to go back and do some obscure editing trick with them.
Digital scrapping files are 8 bits. To make them 16 bits would needlessly make them twice the size. Digital scrapping files are zipped for downloading. If they were in 16 bit format, the zipped files would be even larger than they already are. There is a cost to downloading, paid by the site owner as a part of the cost to have a website. They are not going to pay more to send bigger files for no practical reason.
When I am working with images in Photoshop that have different bit depths and I try to add one to another as a new layer, I get a warning message pop-up. I'm not at the stage where I want to turn off those warning messages, so I edit my photos at 8 bits and I put them into digital layouts that are also at 8 bits. I don't get that annoying pop-up.
I'm not worried about file sizes, I don't have performance issues, and the image quality differences are not visible. Editing my photos at 16 bits counts as too much effort for too little result for me.
Sunday, May 3, 2009
The Pen Tool is My Friend
The pen tool is one of my new best friends. I'm still in the process of learning it. There are directions for controlling curves, and I can't do that yet. I can make so many teeny, tiny straight lines at several hundred times magnified, that I don't need curves yet.
I choose a photo where I want to extract the people. I used to start with the magic wand, but I'm finding that just wastes my time. I select the pen tool and I draw a path. I need to select not only the pen tool, but make sure that the picture of the pen tool with the circles at the corners is selected in the options bar, so I'm making a path, not filling in pixels or creating shape layers.
I zoom in to 300% or more and start clicking. I click and put in points connecting teeny straight lines all around the edge of my person. I might get tired and make it so there's a path along the edge of my person's arm, and then I go off into the background and come back to where I started, so I will have drawn around the person's arm, but not the entire person. The important thing is when I click back on my starting point, there is a completed path and the points vanish, leaving me with a line drawing of some odd shape.
Next, I go to the layers palette and click on the paths tab. There will be one (or more) paths that are called work paths. I select the one I just finished and right click on it. I click to Make Selection and the path turns into marching ants. If I am working in sections, I just make sure the correct layer is selected and hit delete. If I've drawn around the entire person I need to go to Select>Inverse and then I then make sure the correct layer is selected and hit the delete key. The background vanishes, leaving just the person. You only forget to flip to the inverse once. Thank goodness for the History palette!
This amazes my husband. He thinks it's the coolest thing since sliced bread. He is actually popping his head into my studio to check out the progress of things I'm working on! For the first time in all of my scrapping, he can see the finished product based on some in progress step.
For tasks like this, I rename the photo I'm working on and I save it as a new file. The last thing I want to do is lose this amount of work unexpectedly. I can also go back to the extraction and use it later, or fine tune my extraction if I discover I've skipped something that I need to go back and fix later.
And there are things that need fixing. Because Photoshop anti-aliases things, it will 'average' pixels at the edge of a selection. This means that if I selected something to be deleted that averages out to be left in, I've got to go back and refine it with a little erasing.
NSD Shopping Success!
OK, over at Studio Girls there is a designer named Lorie Davison. Go. Shop your little heart out.
Lorie's why I posted about extractions earlier. I wasn't sure, then I opened up her kits and started looking at the bits and pieces. I went back and bought more of her stuff. Yeah. She's that different and that good. I'm not sure if other designers are copying her, or if she's copying someone and just doing it really, really well. Methinks she's the leader of this fad and if she wasn't the one who started it, she's the be-all and end all of it.
I got so many kits that I ended up also getting (for free, from a different site) a Firefox plug-in called "Down it All" to manage the files. I set up that long list of files to download and went off to watch the NASCAR race. In Richmond. When I got back to my computer, all the files were downloaded.
Friday, May 1, 2009
Extractions
That's it in a nutshell. Like most photographers that don't work in a studio, I've got this issue with backgrounds. There's always somebody's foot intruding on my photo, or there is a piece of trash on the ground looking like an ad for a fast food place, or a pole coming out of the top of someone's head. In one shot I took, there was a HUGE sign for the restrooms right above the heads of everyone in the well exposed, otherwise well composed photo.
If you extract the subject, it's like cutting them out of the photo like a paper doll from the paper. There is no background any more. If I were not digital scrapping, it would look really stupid. But in digital scrapping, I can then put the people into a background of my choosing. No shoes, poles, trash or obnoxious signs. I can create a fantasy background, I can come up with something neutral. It all depends on what I feel like doing and what will work with the photo.
I've been looking at a lot of gallery images. Other people's work. It has given me a lot of ideas. I'm no longer limited to a simple rectangle, nor even a shape with borders or fancy corners.
This is what I was hoping to transition to, truly digital scrapping. I don't want to create a layout that I could reproduce in paper, I want to create layouts that are digital. I'm not there yet, but I can see what I need to work on.
Extractions are not always easy to do, especially if the subject has wispy hair. My hair isn't wispy and Bud shaves his head. Easy extractions? Possibly, and possibly not. But I'm sure going to try.
NSD Sale Shopping
National Scrapbooking day is the first Saturday in May. The sales have started, especially for the digital world. I have spent a good deal of time looking through websites I monitor regularly, checking out new websites and creating wish lists and filling shopping carts.
I'm not going to get a whole lot of kits. There are a limited number of designers that I keep track of and an even shorter list that I buy from. I did find two new designers I might like, but I'm going to wait until I've downloaded the kits and taken a close look at them before I make any statements. I scrap for mostly adult men and therefore, any kid oriented or girly kit is not interesting to me. I'm particular about my realism, too. That really limits the kits that I'm interested in.
Where do I go to find out about digital scrapping designers and stores? There's a forum called DigiShopTalk that I find to be useful. The gallery is pretty darned good and there are lots of designers that will pop in and make comments on the forum.
Am I even planning to leave the house and look for anything for paper scrapping? No. Only digital stuff.
Subscribe to:
Posts (Atom)


